


Peanut Butter Jelly Cookies
February 12, 2025
20 minutes
super easy
14-15 cookies
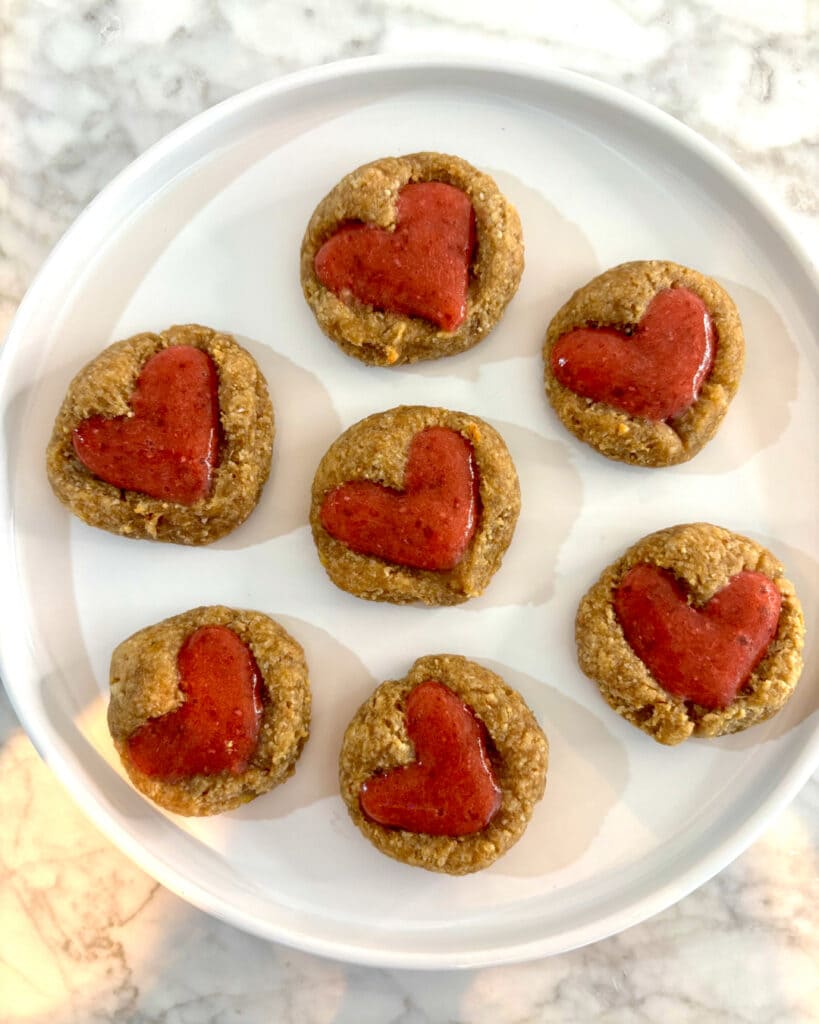
Peanut Butter Jelly Cookies for Babies and Toddlers: Made With No Refined Sugar
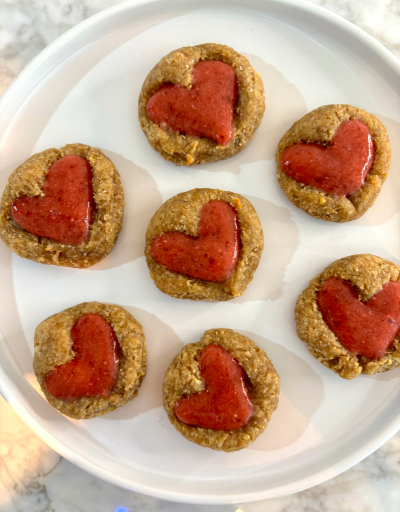
Finding nutritious and baby-friendly treats can be challenging, especially when avoiding refined sugar and processed ingredients. These Peanut Butter Jelly Cookies are a wholesome and delicious vegan snack and dessert for babies, made with just four simple ingredients, almond flour, banana, peanut butter, and no-sugar jam. They’re soft, nutrient-dense, and perfect for baby-led weaning (BLW) or toddler snacks. I made them with a heart shape in the middle to make a cute Valentine’s Day Cookie
With the natural sweetness of banana, healthy fats from peanut butter and almond flour, and the fruity goodness of sugar-free jam, these cookies provide essential nutrients while being easy to hold, chew, and digest. Plus, they’re gluten-free and dairy-free, making them suitable for little ones with food sensitivities. These are excellent cookies for on the go snack or daycare lunchboxes.
Why These Cookies Are Great for Babies and Toddlers:
No Added Sugar – Naturally sweetened with banana and fruit jam, these are the perfect dessert for babies and a yummy Valentines Day Treat.
Soft and Baby-Friendly – Easy to chew, making them perfect for early eaters and BLW.
Nutrient-Packed – Provides healthy fats, protein, fiber, and essential vitamins.
Allergy-Friendly – Made with almond flour instead of wheat, ideal for gluten-sensitive babies. These cookies are vegan, egg-free and dairy-free.
Easy to Make – Only four ingredients and ready in under 20 minutes!
Nutritional Benefits:
Almond Flour – High in healthy fats, protein, and vitamin E, which support brain development.
Banana – Provides natural sweetness, fiber, and potassium, aiding digestion and muscle growth.
Peanut Butter – Packed with protein and healthy fats for sustained energy and growth.
No-Sugar Jam – A great way to introduce fruit flavors without added sweeteners. Try making them with my Homemade Strawberry Chia Jam!
Tips for Success:
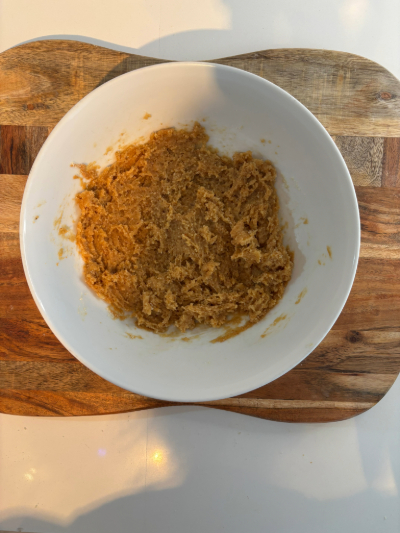
-Try using runny peanut butter for easier mixing.
-Make sure to chill the dough for 10 minutes in the refrigerator.
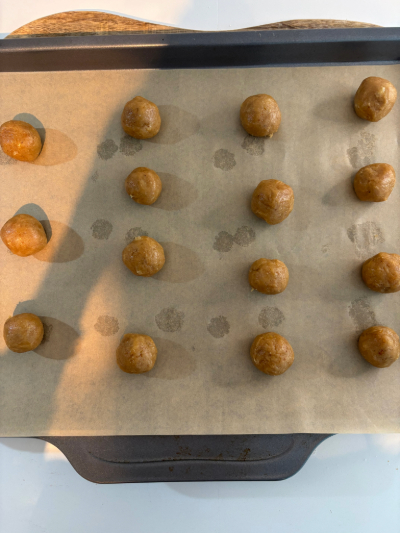
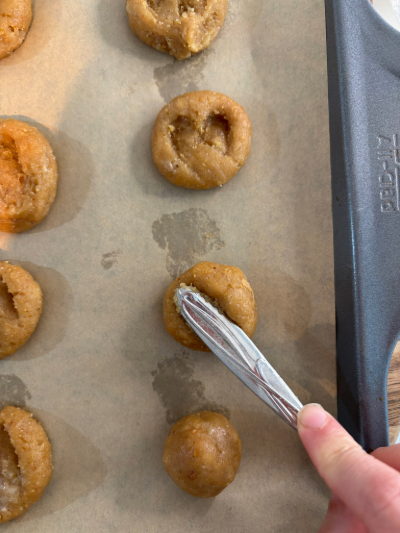
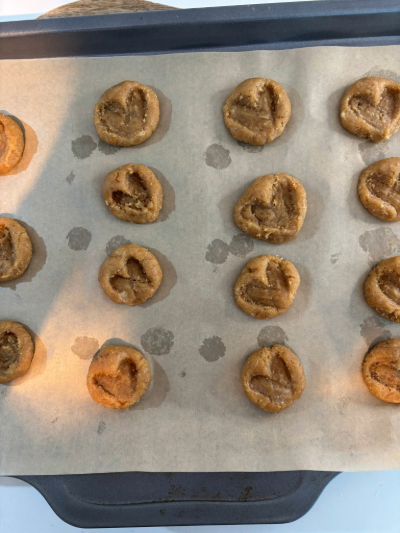
-Use the other side of a kitchen utensil to make a heart shape in the inside of the cookie. You can also use your thumb if you want to form a circle.
-When adding the jam, I recommend adding it to a small ziplock, cutting off tip and piping it on cookie.
-If you would like to store cookies on countertop, I recommend adding jam right before serving. The cookies also taste great on their own. Once you add jam, make sure to store in a ziplock or container in the fridge for up to 3 days.
How to Serve These Cookies:
- For Babies (6+ Months) – Break into small, soft pieces for easier chewing.
- For Toddlers – Serve whole as a nutritious snack or breakfast option.
- For the Whole Family – Enjoy as a healthy, homemade treat with a cup of milk or yogurt.
What you need:
Ziplock or Piping Bag
Substitutions:
Almond flour- Can be replaced with oat flour.
Banana- I don’t recommend replacing the banana in this recipe.
Peanut Butter- This can be substituted with almond butter or sunflower seed butter.
Strawberry Jam- You can use any no-added sugar jam that you prefer or make my homemade strawberry chia jam.
If you enjoyed this recipe, here are some more baby desserts you can check out:
Ingredients
Adjust Servings
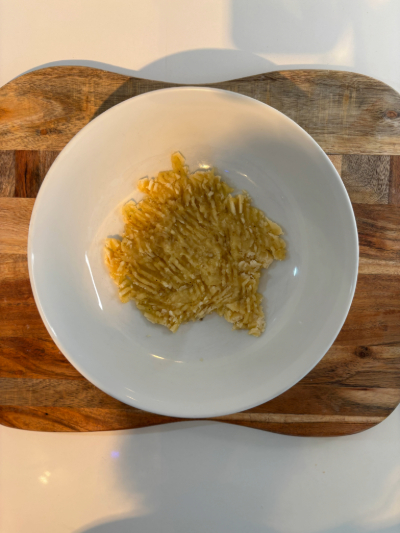
| 1 1/2 or 1/3 cup ripe bananas | |
| 1/2 cup peanut butter | |
| 3/4 cup almond flour | |
| jam of choice |
Directions
1.
2.
3.
4.
5.
6.
7.
8.
Notes
4 Comments
-
-
 Eating With Zion
Hi, you can substitute with oat flour. All-purpose won’t come out the same.
-
-
Dalya
Can you share your recipe for the jam for a toddler?
-
Eating With Zion
Yes! This is the exact strawberry jam recipe I used, except I did blend it before adding to the cookie https://eatingwithzion.com/recipe/strawberry-chia-jam/
-
can you use all purpose flour?